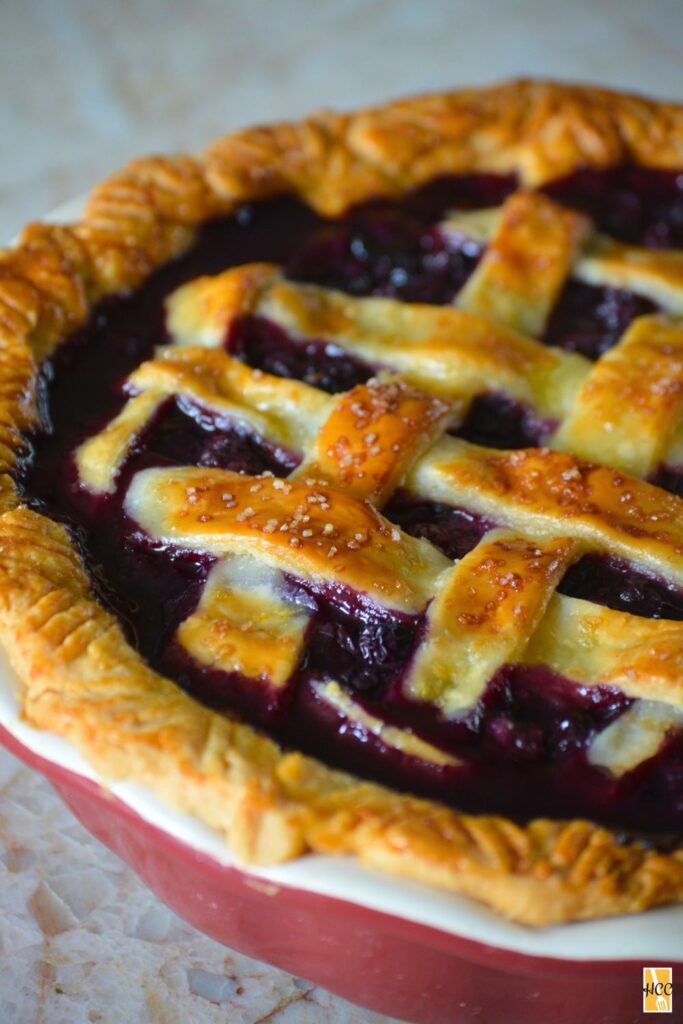
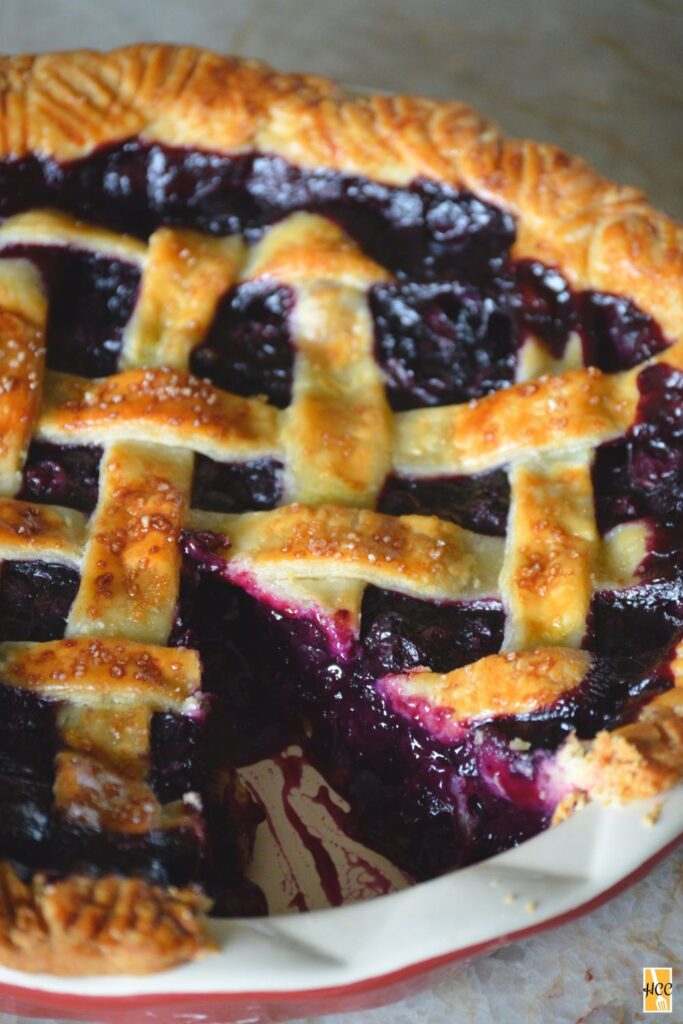
Summer is the season for homemade fruit pies. And what better one to make than a classic blueberry pie? With a rich and flaky lattice crust, and a thick (not soupy) filling with just the right amount of sweetness. It is the perfect dessert for any summer cookout!
Pie Crust
- Homemade pie crust: Of course, you can go out and buy premade pie crust from your local grocery store, but I highly recommend you make it yourself at home. Not only is it incredibly easy, but I guarantee it will taste so much better. And if you use our recipe for Homemade Pie Crust you’ll have the exact amount you’ll need (2 crusts) for today’s pie.
- Lattice top: I love making lattice tops for more traditional pies (like blueberry pie!). And that’s what we’ll be doing in the recipe below. However, if you’ve never made a lattice top for a pie before don’t worry, it’s not difficult at all. That being said if you’d like a more in-depth lesson on how to do it I recommend you check out this post from SimplyRescipes.com.
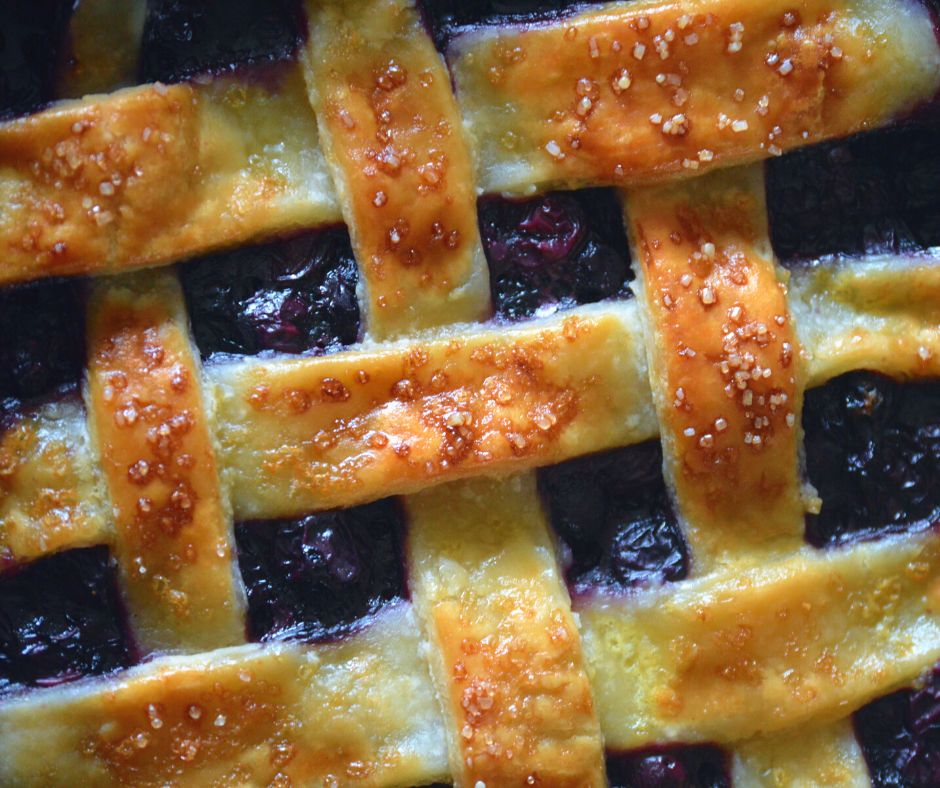
- Make sure the pie crust doesn’t burn: Trust me the last thing you want to happen to your pie is to end up with a burnt crust. Luckily there are a few simple ways to guarantee this doesn’t happen.
- First is the pie crust shield! These are large rings made out of aluminum/silicon that you place over the outer edge of the pie (because this area tends to burn first). And while you can purchase these from the store/online, you can also make them yourself with sheets of aluminum foil.
- However, sometimes when a pie is baked for a very long time (like today’s recipe) you might want to shield the entire curst. And the easiest way to do that is to gently tent the whole thing in a sheet of aluminum foil.
- Of course, you might not need to use either of these things. But please make sure to keep an eye on your pie while it’s baking. And if at any point the crust seems to be browning up quickly use your best judgment and apply one of these two options.
Blueberries
- Frozen or fresh blueberries?: I definitely recommend you use fresh blueberries when you have access to them. However, if all you have is frozen blueberries that’s perfectly fine. Just make sure that you don’t defrost them as they might end up releasing too much liquid resulting in a soggy crust and soupy filling.
- Taste for sweetness: Depending on the time of the year your blueberries might be super sweet or not sweet at all. That’s why I suggest you taste a few of them before mixing them with all of the other filling ingredients. And if you find that they generally lack sweetness you can always adjust for this by adding another tablespoon or two of sugar to the filling mixture.
Thickening Your Blueberry Pie
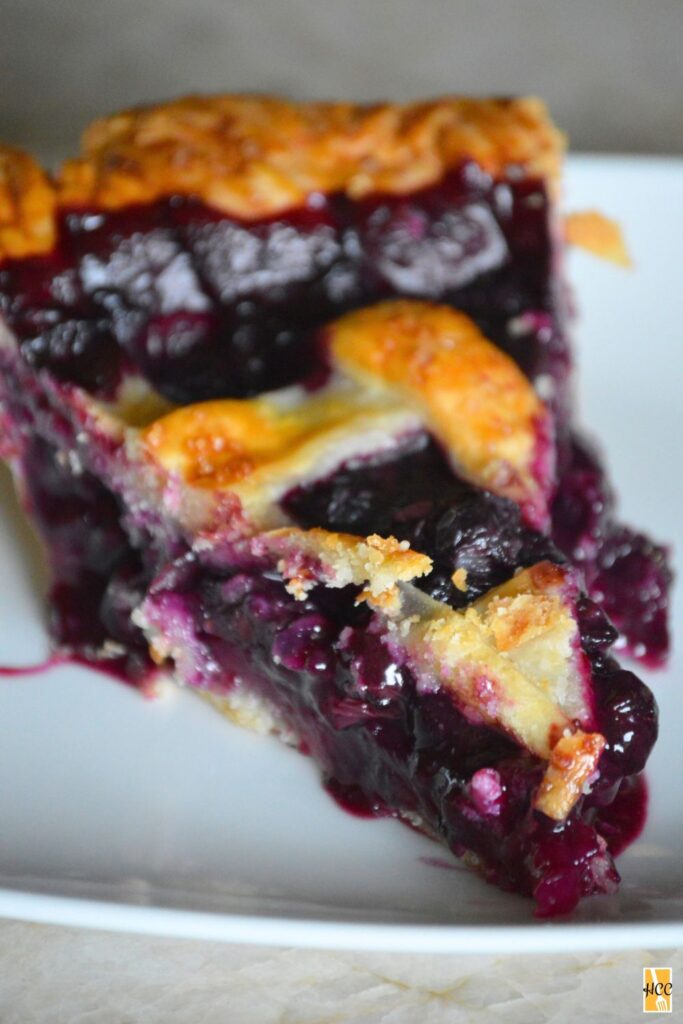
- Cornstarch vs flour: No one likes to cut into a pie and have the filling drain out because it’s too thin. That’s why you need to thicken up the filling with either cornstarch or flour. And while you can use either one I highly recommend you use a combination of both. I can’t fully explain the science behind it, but it always gives me the best results.
Storage
- Just like any other type of fruit-based pie you can store this blueberry pie at room temperature on your kitchen counter for 2 days. Just make sure to keep it covered with either aluminum foil or plastic wrap. However, if it lasts any longer than that I suggest you keep it in your fridge where it should last at least 5 days in total. But let’s be honest, it ain’t going to last that long folks.
Other Desserts You Might Enjoy
Blueberry Pie Recipe
Prep time: 20 minutes
Cook time: 1 hour
Servings: 8
Ingredients
Chilled pie crust, homemade (our recipe make 2 crust, 1 bottom & 1 top) or store-bought
6 Cups of Blueberries
⅔ Cup of granulated sugar
6 Tablespoons of cornstarch or all-purpose flour
¼ Teaspoon of cinnamon
Juice from 1 large lemon, which should be roughly 2 tablespoons
1 Tablespoon of unsalted butter
Egg wash: 1 large egg & 1 Tablespoon of cream whisked together
Coarse sugar (optional)
Instructions
- Preheat your oven to 425℉/218℃, and set the rack you’ll be baking the pie on in the lower third of the oven.
- Make the filling: Add the blueberries, granulated sugar, cornstarch/flour, cinnamon, and lemon juice to a mixing bowl. Stir these ingredients together until all of the blueberries are coated and the cornstarch/flour mixture no longer appears dry. Set this aside for now.
- Assemble the bottom crust for the pie: Take one pie crust out of your fridge (leave the other one in the fridge) and place it on a flat floured surface. Flatten the dough with a rolling pin in a circular manner until it is 12 inches in diameter.
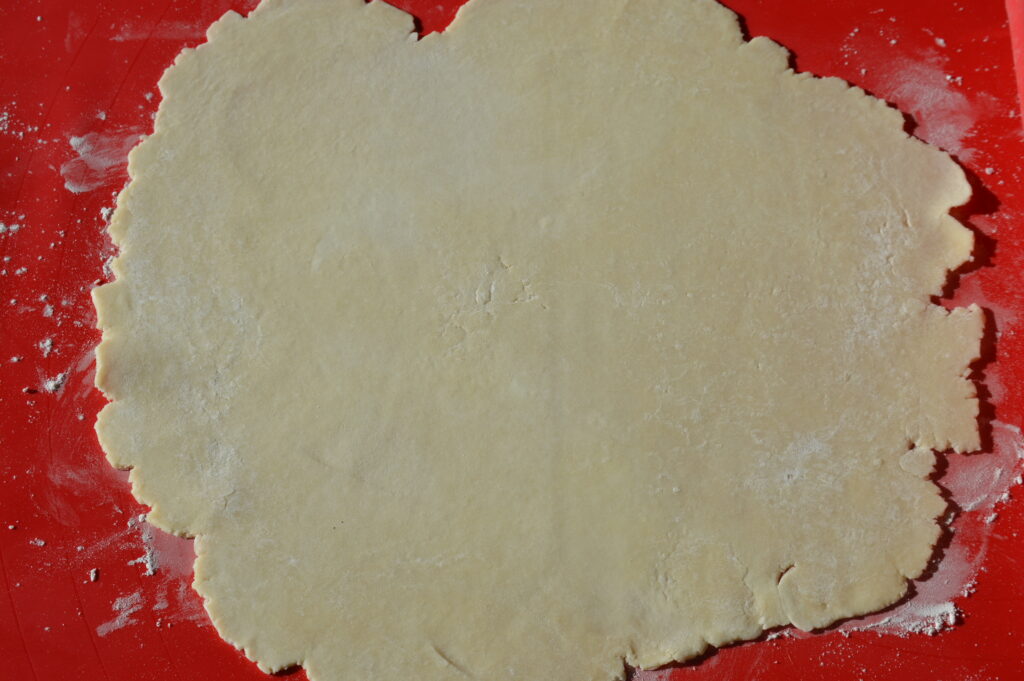 Carefully lift the crust off the flat surface and place it into either an 8-inch or 9-inch (2 inches deep) pie dish. Gently press the crust into the dish with your hands so that it is smooth and in line with the dish.
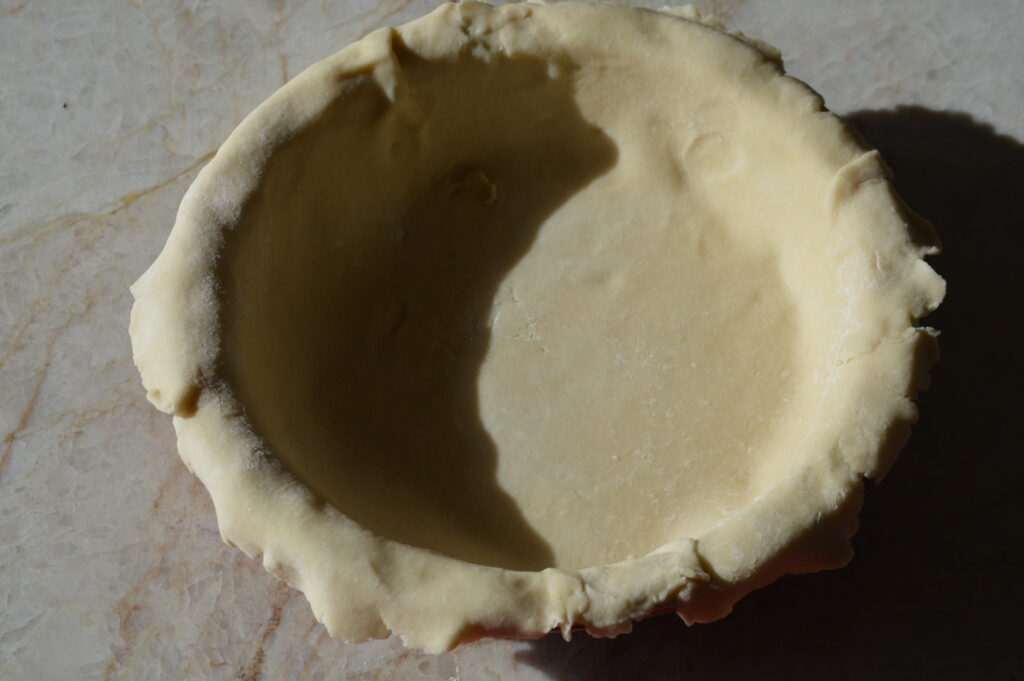 Then use a knife to trim off any excess pie crust that might be hanging off the dish (you want no more than ¾ of an inch hanging off).
- Pour the blueberry filling into the pie crust we just prepared.
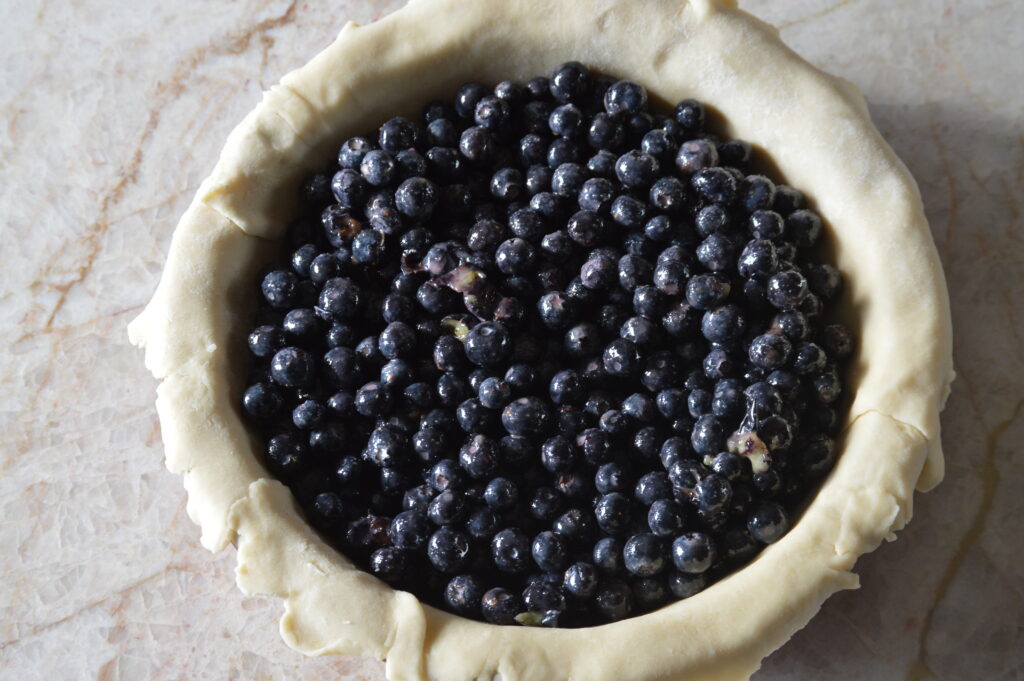
- Make the lattice top: Place the other pie crust on a flat floured surface. Roll it out to the same size and shape as the last one (circular, 12-inch diameter). Use either a sharp knife or a pizza cutter to cut the crust into 10 strips.
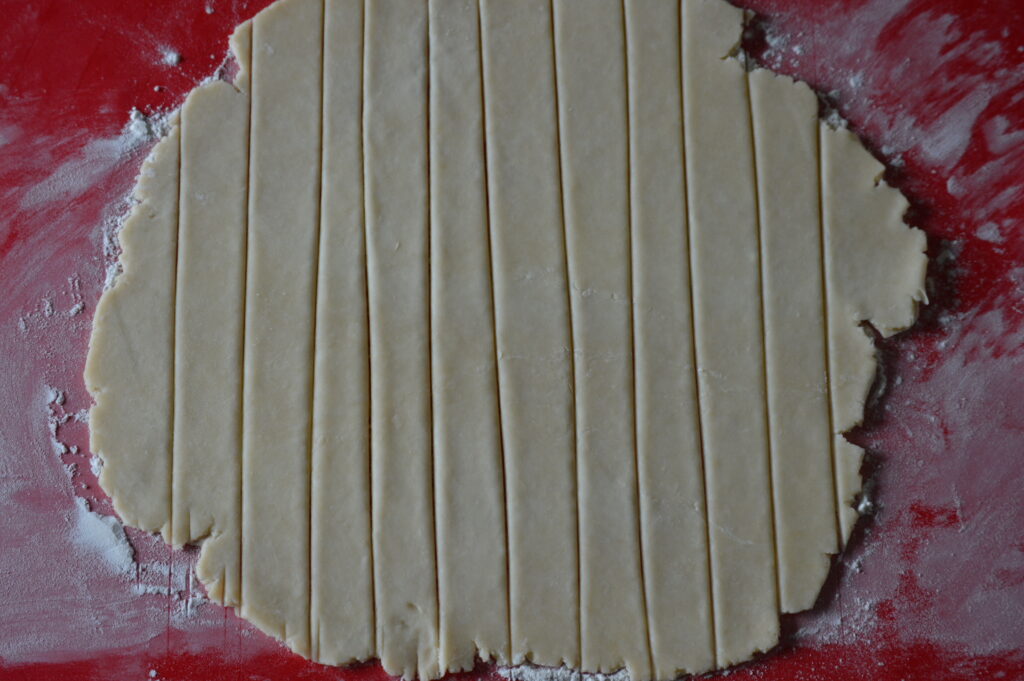 Arrange 5 of the strips parallel over the top of the filled pie with gaps in between. Carefully fold back the 2nd and 4th strips and place 1 strip of crust perpendicular to them.
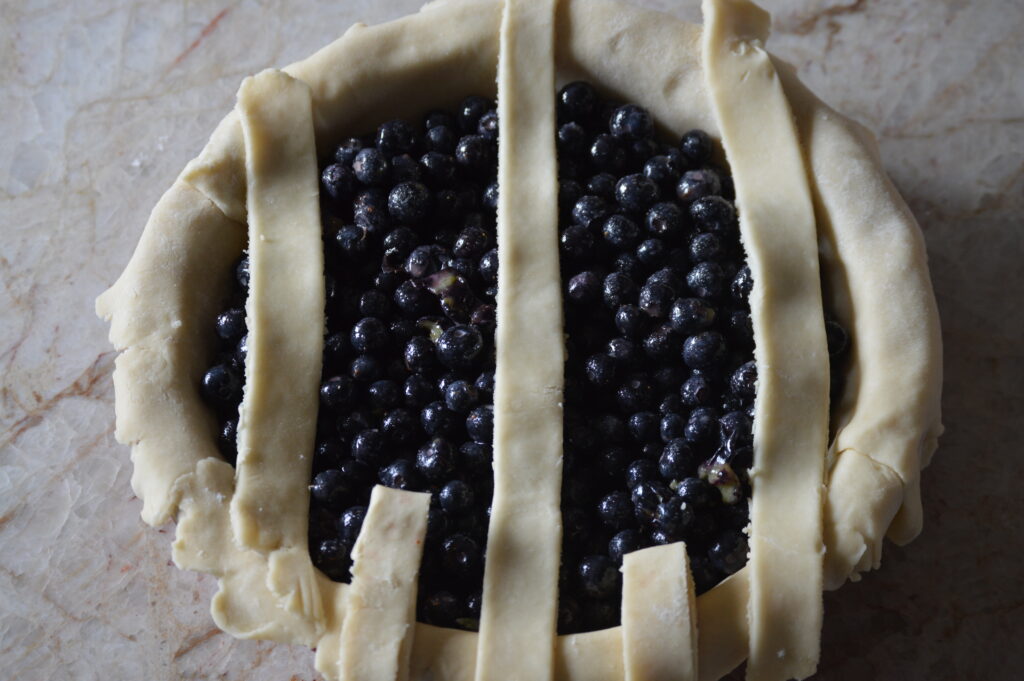
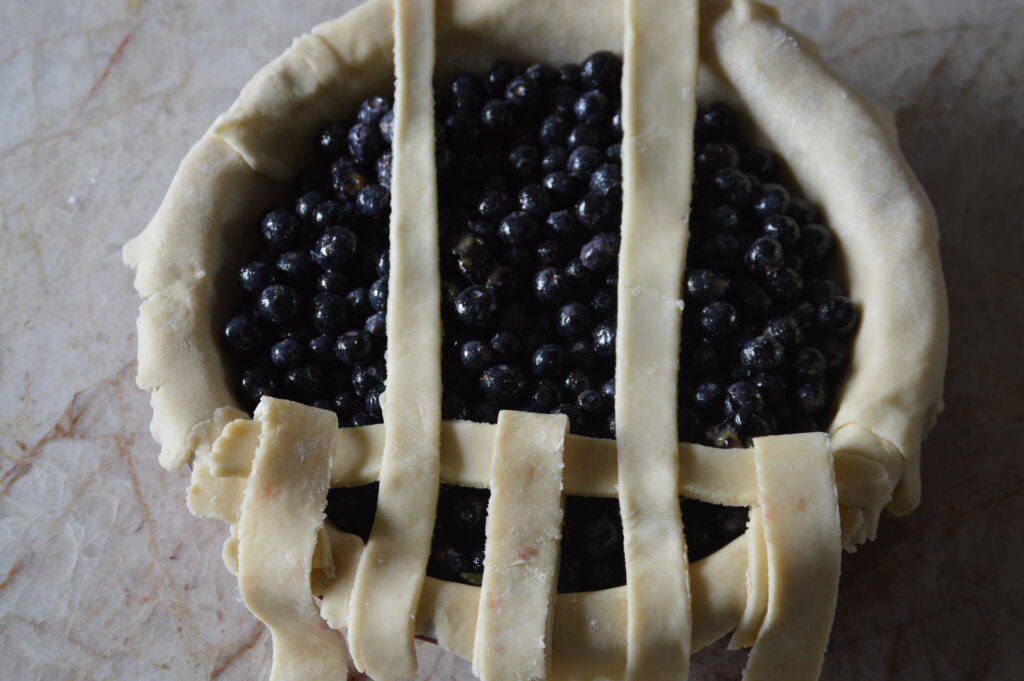 Unfold the 2nd and 4th strips back over this new strip. Then fold back the 1st, 3rd, and 5th strips and place a second strip of crust perpendicular. Unfold those back then repeat these steps until the 3 remaining strips are placed into the lattice.
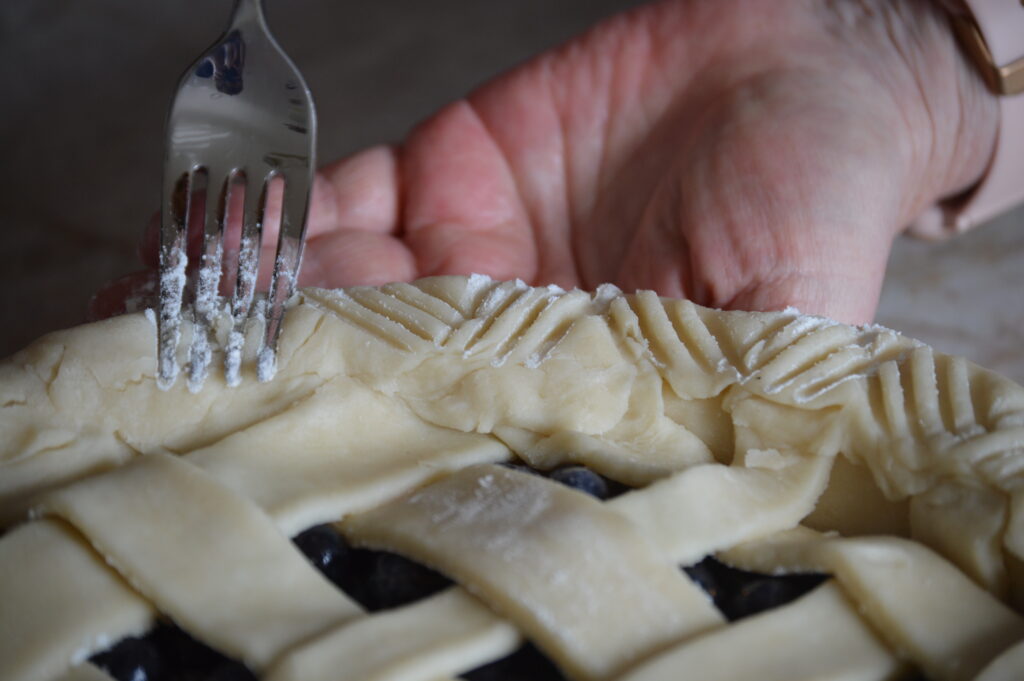
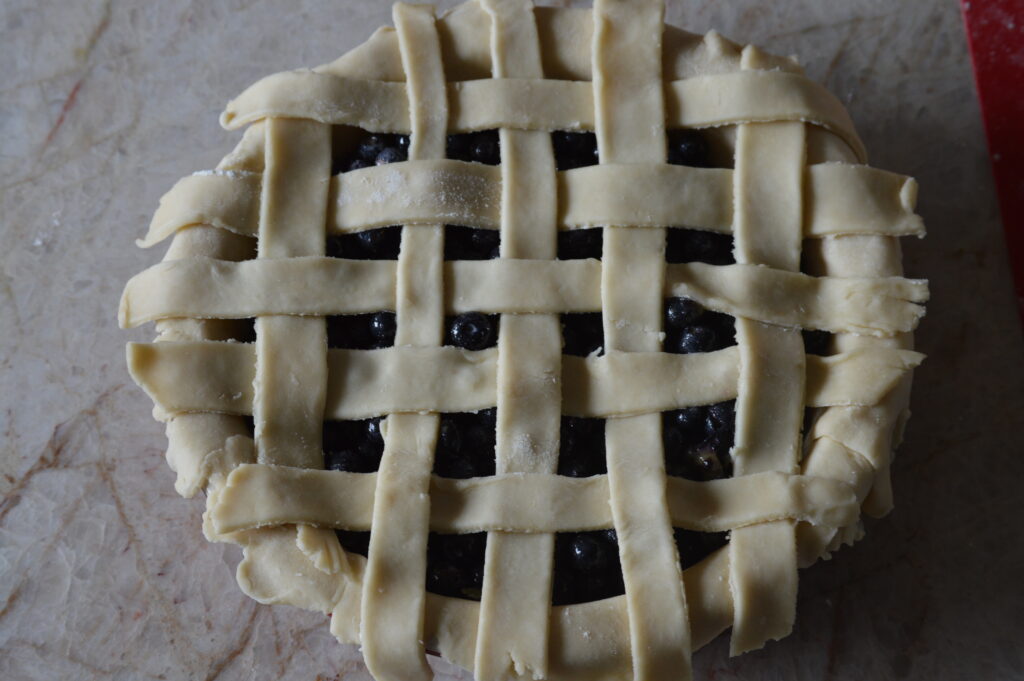 If you’d like more information on how to do this process I recommend you check out the link provided in the “Pie Crust” section above. After the lattice is laid down press the edges of the strips to the bottom pie crust in order to seal them together. Then cut off any excess crust and either flute or crimp the edges with a fork or your fingers.
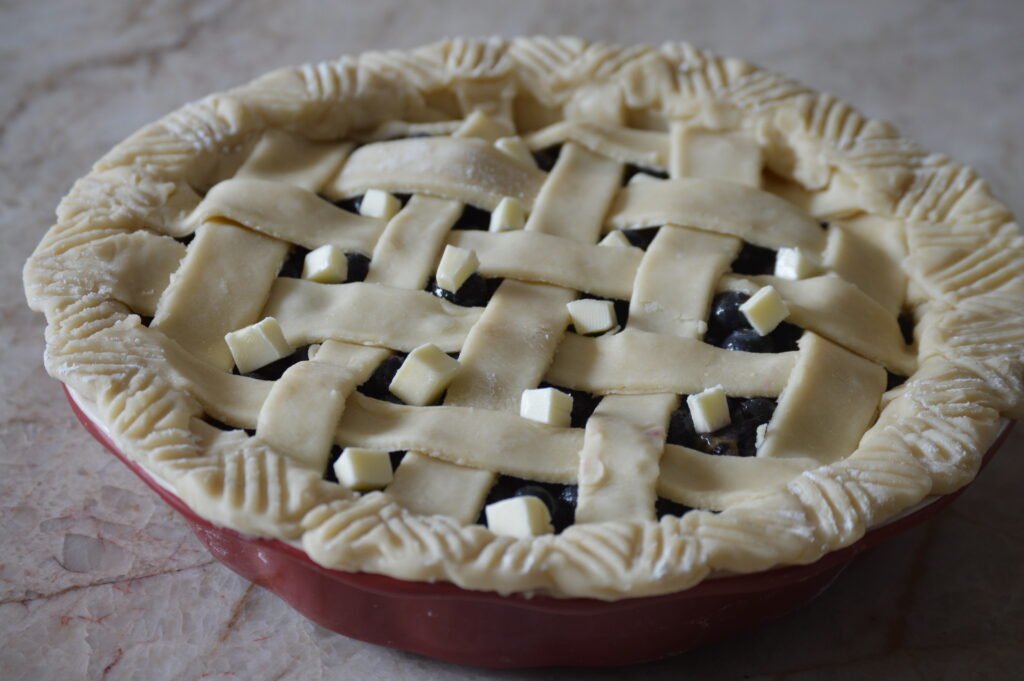
- Cut the tablespoon of unsalted butter into small chunks then dot them over the holes left from the lattice crust.
- Whisk together the egg and cream to make the egg wash. Then brush the lattice crust with the wash and sprinkle with coarse sugar.
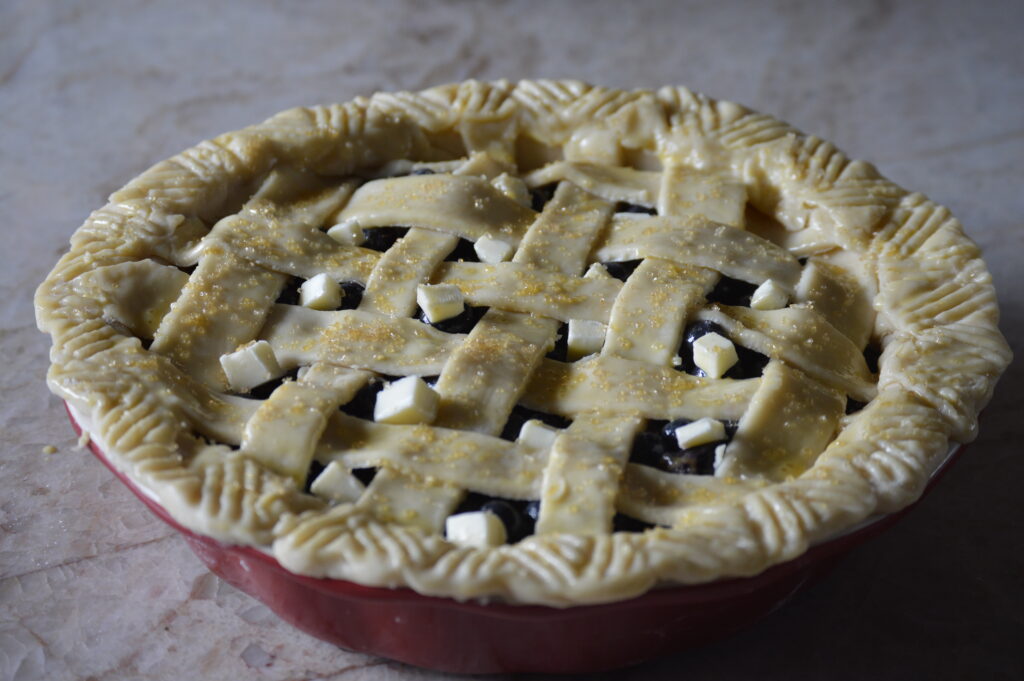
- (Optional) Place the pie in your fridge to let it cool for 20 minutes. You can skip this step but it does result in a better crust.
- Bake: Place the pie on a baking sheet (that way it will catch any filling that might drip out while baking), and into your heated oven. Let the pie bake undisturbed for 20 minutes. Then lower the heat of your oven to 375℉/190℃ and let the pie continue to bake for an additional 40 to 50 minutes. And while it’s not necessary I highly recommend you add a pie shield or better yet full sheet of aluminum foil (check “Pie Crust” above) at this point so that the crust doesn’t burn. You will know that the pie is done when the crust is golden brown, and the filling is hot & bubbling with an internal temperature of 200℉/93℃.
- Rest: Remove the baked pie from your oven and let it rest on a rack for roughly 4 to 5 hours. You want to make sure that it’s at least room temperature in order for the filling to set. Or else it will be too liquidy and run out when you slice into it. And trust me you don’t want to put in all this work to have that happen, so patience!
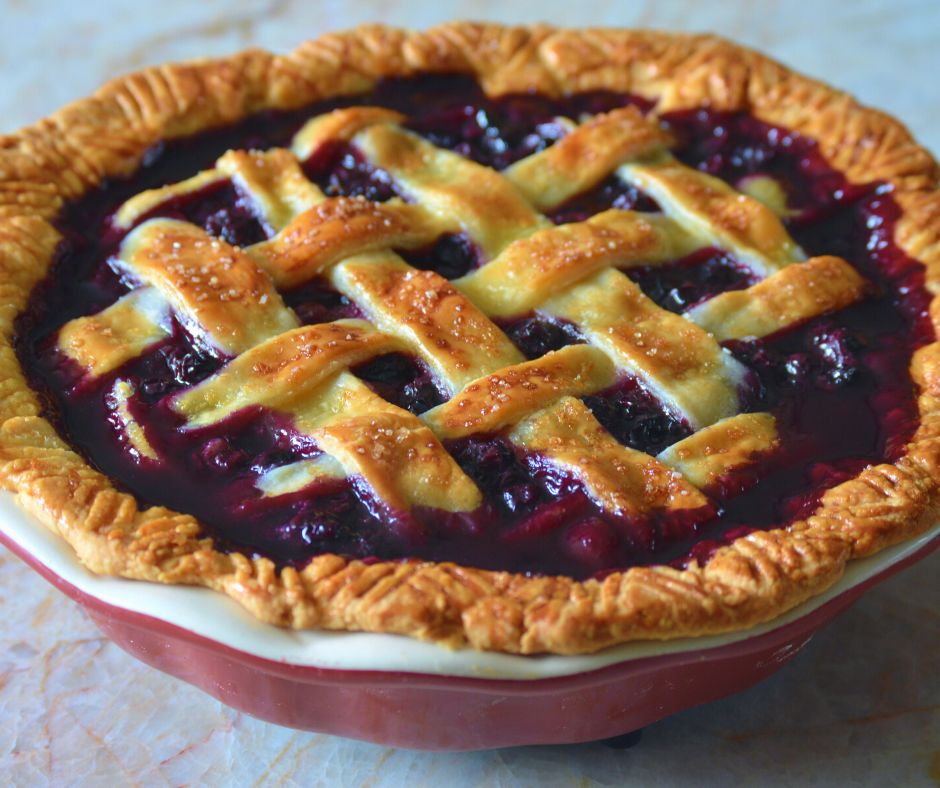
- Once the blueberry pie is at room temperature slice it into pieces and enjoy!
Blueberry Pie Recipe
Summer is the season for homemade fruit pies. And what better one to make than a classic blueberry pie? With a rich and flaky lattice crust, and a thick (not soupy) filling with just the right amount of sweetness. It is the perfect dessert for any summer cookout!
Servings: 8
Equipment
- 9-inch (2 inches deep) pie dish
Ingredients
- Chilled pie crust homemade (our recipe make 2 crust, 1 bottom & 1 top) or store-bought
- 6 Cups of Blueberries
- ⅔ Cup of granulated sugar
- 6 Tablespoons of cornstarch or all-purpose flour
- ¼ Teaspoon of cinnamon
- Juice from 1 large lemon which should be roughly 2 tablespoons
- 1 Tablespoon of unsalted butter
- Egg wash: 1 large egg & 1 Tablespoon of cream whisked together
- Coarse sugar optional
Instructions
- Preheat your oven to 425℉/218℃, and set the rack you’ll be baking the pie on in the lower third of the oven.
- Make the filling: Add the blueberries, granulated sugar, cornstarch/flour, cinnamon, and lemon juice to a mixing bowl. Stir these ingredients together until all of the blueberries are coated and the cornstarch/flour mixture no longer appears dry. Set this aside for now.
- Assemble the bottom crust for the pie: Take one pie crust out of your fridge (leave the other one in the fridge) and place it on a flat floured surface. Flatten the dough with a rolling pin in a circular manner until it is 12 inches in diameter. Carefully lift the crust off the flat surface and place it into either an 8-inch or 9-inch (2 inches deep) pie dish. Gently press the crust into the dish with your hands so that it is smooth and in line with the dish. Then use a knife to trim off any excess pie crust that might be hanging off the dish (you want no more than ¾ of an inch hanging off).
- Pour the blueberry filling into the pie crust we just prepared.
- Make the lattice top: Place the other pie crust on a flat floured surface. Roll it out to the same size and shape as the last one (circular, 12-inch diameter). Use either a sharp knife or a pizza cutter to cut the crust into 10 strips. Arrange 5 of the strips parallel over the top of the filled pie with gaps in between. Carefully fold back the 2nd and 4th strips and place 1 strip of crust perpendicular to them. Unfold the 2nd and 4th strips back over this new strip. Then fold back the 1st, 3rd, and 5th strips and place a second strip of crust perpendicular. Unfold those back then repeat these steps until the 3 remaining strips are placed into the lattice. If you’d like more information on how to do this process I recommend you check out the link provided in the “Pie Crust” section above. After the lattice is laid down press the edges of the strips to the bottom pie crust in order to seal them together. Then cut off any excess crust and either flute or crimp the edges with a fork or your fingers.
- Cut the tablespoon of unsalted butter into small chunks then dot them over the holes left from the lattice crust.
- Whisk together the egg and cream to make the egg wash. Then brush the lattice crust with the wash and sprinkle with coarse sugar.
- (Optional) Place the pie in your fridge to let it cool for 20 minutes. You can skip this step but it does result in a better crust.
- Bake: Place the pie on a baking sheet (that way it will catch any filling that might drip out while baking), and into your heated oven. Let the pie bake undisturbed for 20 minutes. Then lower the heat of your oven to 375℉/190℃ and let the pie continue to bake for an additional 40 to 50 minutes. And while it’s not necessary I highly recommend you add a pie shield or better yet full sheet of aluminum foil (check “Pie Crust” above) at this point so that the crust doesn’t burn. You will know that the pie is done when the crust is golden brown, and the filling is hot & bubbling with an internal temperature of 200℉/93℃.
- Rest: Remove the baked pie from your oven and let it rest on a rack for roughly 4 to 5 hours. You want to make sure that it’s at least room temperature in order for the filling to set. Or else it will be too liquidy and run out when you slice into it. And trust me you don’t want to put in all this work to have that happen, so patience!
- Once the blueberry pie is at room temperature slice it into pieces and enjoy!
Notes
- Homemade pie crust: Of course, you can go out and buy premade pie crust from your local grocery store, but I highly recommend you make it yourself at home. Not only is it incredibly easy, but I guarantee it will taste so much better. And if you use our recipe for Homemade Pie Crust you’ll have the exact amount you’ll need (2 crusts) for today’s pie.
- Lattice top: I love making lattice tops for more traditional pies (like blueberry pie!). And that’s what we’ll be doing in the recipe below. However, if you’ve never made a lattice top for a pie before don’t worry, it’s not difficult at all. That being said if you’d like a more in-depth lesson on how to do it I recommend you check out this post from SimplyRescipes.com.
- Make sure the pie crust doesn’t burn: Trust me the last thing you want to happen to your pie is to end up with a burnt crust. Luckily there are a few simple ways to guarantee this doesn’t happen.
- First is the pie crust shield! These are large rings made out of aluminum/silicon that you place over the outer edge of the pie (because this area tends to burn first). And while you can purchase these from the store/online, you can also make them yourself with sheets of aluminum foil.
- However, sometimes when a pie is baked for a very long time (like today’s recipe) you might want to shield the entire curst. And the easiest way to do that is to gently tent the whole thing in a sheet of aluminum foil.
- Of course, you might not need to use either of these things. But please make sure to keep an eye on your pie while it’s baking. And if at any point the crust seems to be browning up quickly use your best judgment and apply one of these two options.


